Sunday 22 February 2015

Production Project-Modelling the streets!

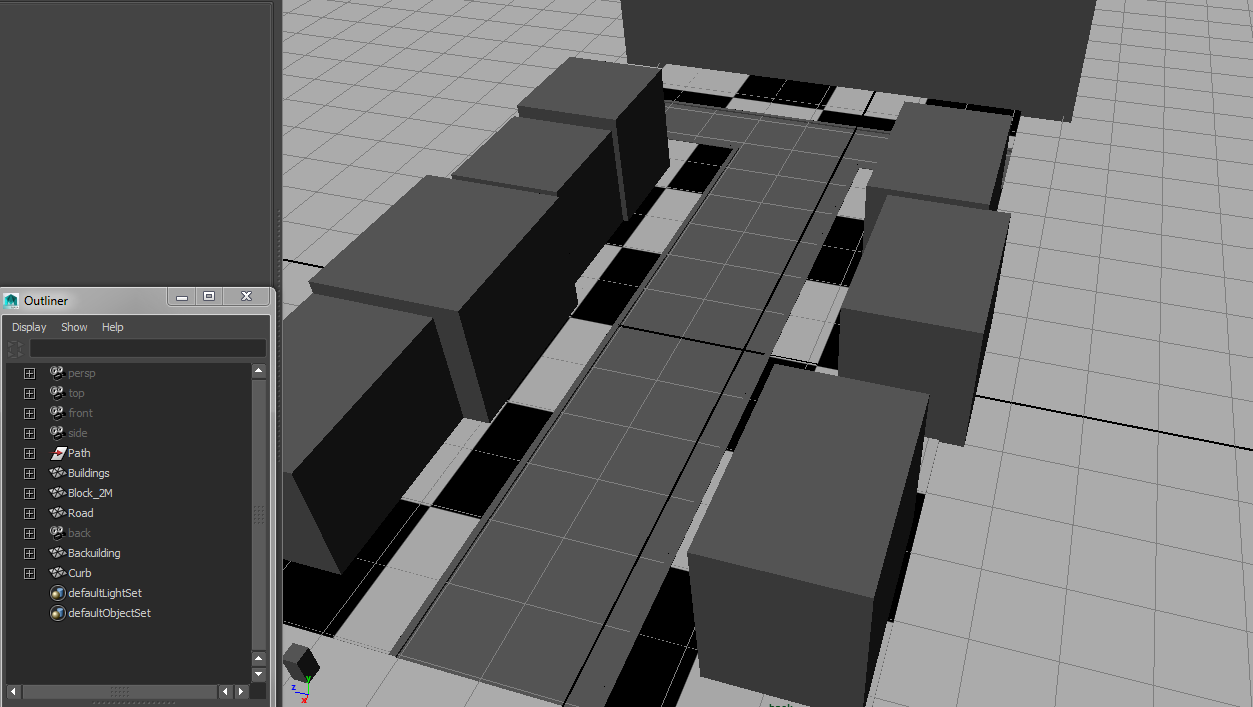
Initial set up of my scene requires streets to be made. Blocking in the area with basic shapes which I can then edit to create the scene is how I started. Even detailing a little of the road, where it dips for a drain under the curb.


There is a small cube just off of the scene in the top pic. That is set as 2m tall (about 6 foot), which I am using as a reference for the detailing of doors and windows.

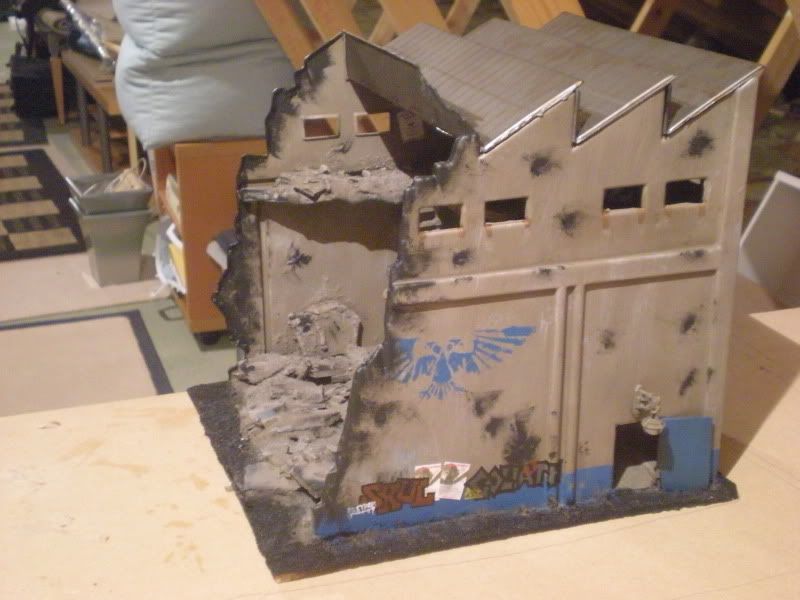
For damaging the buildings I will be making duplicates and using a Boolean function, so that one model will have a chunk missing, the other version will leave the chunk, which can then be used as ruin on the street.
Lesser damage can be gained from simply adding textures (cracks in brick faces and such)


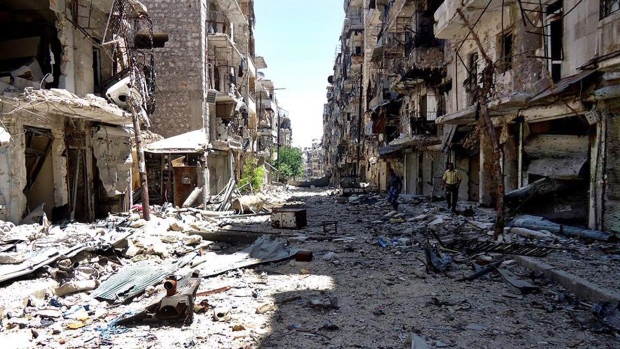
Following are some reference shots for building damage. Some more than others, including an image of the street covered in rubble.

Following: Detailing the buildings. I documented the process for building the fronts of the buildings in video. I tried not to make them tutorial videos.


https://www.youtube.com/watch?v=I5IXo_2fQ24


https://www.youtube.com/watch?v=G5EZHYx1B-0


https://www.youtube.com/watch?v=YPLeNz-WK-E

Moving on from here, I need to make a doorway and edit the window I've made to make further floors. I explain how I would do this in the last video. Also, I would have to add some bevels for when I add the lighting. The bevels would stop things from looking overly sharp.

This technique I will use to create the styles for other buildings. I'd like to make some shop fronts, too as this would give the street some variance in it's buildings.


UPDATE:
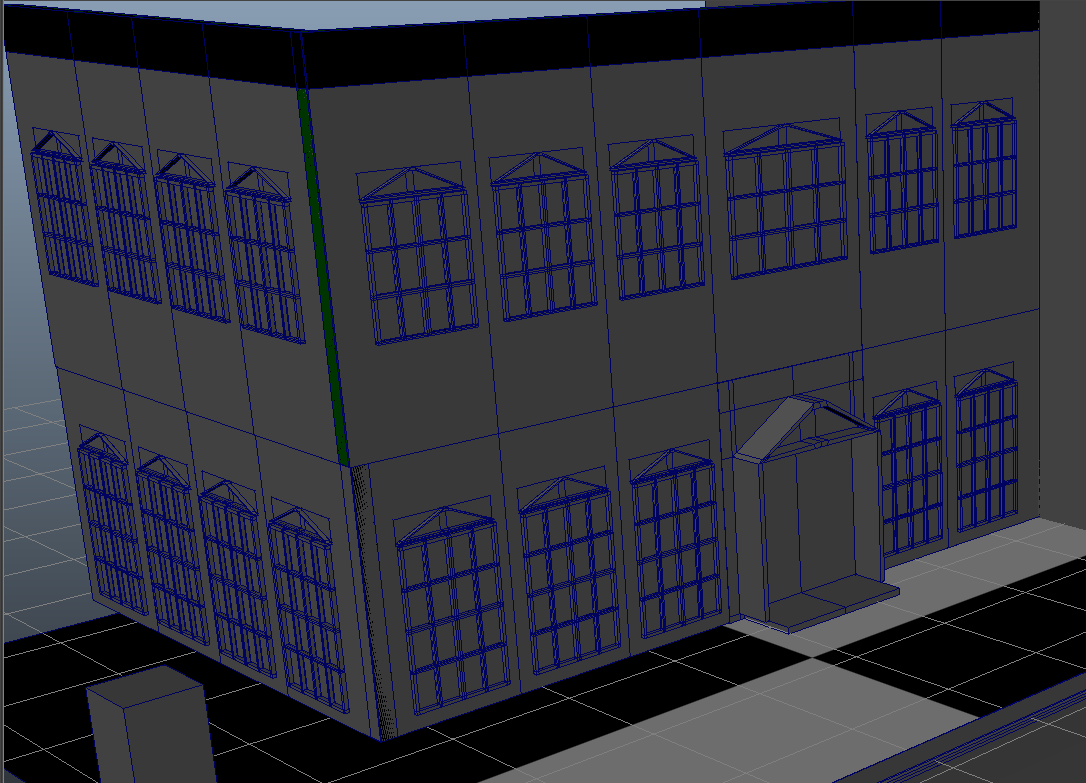
The blocking in cube has been removed and the visible faces of the first building are in place. My tutor, Amrinder said that I'd be able to get away with using this design for most of the the street, as modelling is not my main focus for this project. I've kept the pyramid arch for the door to tie it into the rest of the building.


UPDATE:

Took a step back from the above screenshot to fix a couple things and will make a different door front. I've begun texturing the building.
The blue tint is a cinematic night shot. Cinematic night is a blue tone, as true night would make it impossible to see what was going on.

I added bump and spec maps to the walls, but I wasn't happy with the bump.

More edits to the bump map

And a final edit.

I was unhappy with all of the bump maps, so went without one, which gave it an almost marble look. With the Phong material setting to allow spec maps to be applied, it gives a nice, subtle shine

Showing the difference between angles from the light.

Then adding the windowframe texture. This is simply a white phong.

Advanced Animation and VFX - Week 3

Not much to show in the way of updates. Working more on the blocking in and modelling of the ring and arena, especially focusing on the UV maps.

I want to have a design on the apron like WWE has on the RAW ring,

Like these, but tailored to myself and cmanim.com.
Also, for the ropes, adding texture to them via the textures. This will mean I won't have to model the "rope" look which will absolutely kill my poly count.

Here's a look at my Gannt Chart as it stands

Advanced Animation and VFX Week 3 - Logo

Looking at industry logos for inspiration of my own, updating it from the Scanline effect version I had been using. Not all animation companies have graphic logos, some opting simply for text, which then becomes identifiable itself. 

Moving on, I began sketching out ideas. A "key" shape stood out to me, as key-key frame animation. Get it? I crack me up!

I tried different fonts and variations, with an without scan lines. In the end, I opted for just text, as fonts that made looks I liked weren't very easy to read. In the image, I explain my reason for the neon look.


A few variations. The black background is simple and easy to read. Maybe the Starburst pattern emanating from the corners in future tests, but honestly, I like the black background.

Sunday 15 February 2015

Advanced Animation and VFX- Week 2 Part 2

Week 2- SCRIPT.

The script for the sequence revolves around the Commentator. The lines are based on Michael Cole and John "Bradshaw" Layfield from WWE.

I've only slightly altered the script from what the Storyboard shows.


CMA WRESTLING

(Wrestlers are on their knees in the ring)
Com: “OH MY GOD, HE'S BROKEN IN HALF!”

(Heel Stands up)
Com: “HOW CAN HE GET BACK ON HIS FEET?! THE CMA UNIVERSE JUST CAN'T BELIEVE IT!”

(Heel Rebounds off the ropes)
Com: THIS IS IT! IT'S OVER NOW!”

(Reversal)
Com: “OH MY GOD, REVERSAL! GTS!”


Week 2 Gannt Chart
An updated Wk2 Gannt chart. Blocking in of the animation is not completed yet. Week 3 will focus on finishing the modelling, texturing and blocking in the animation.

Advanced Animation and VFX WEEK 2 - Part1

Week 2
After presenting the previous post to class to show my ideas and gain some initial feedback and pointers (some of the questions I had thought about already, so I had answers prepared for those, like would I be using a Crowd simulation? - Which I'm not sold on at the moment. My focus is the character animation, so crowd simulation would be an after thought) I went forward with my plan.
I've been working primarily on the scenery, getting it to code and gaining feedback from other animators and modellers.
 So my initial ring which I used in the blocking out animation presented to the class looked like this, a very basic set up. This was used at the start just to give a little context to  the piece and help with staging. This was never intended to be used in a final piece.

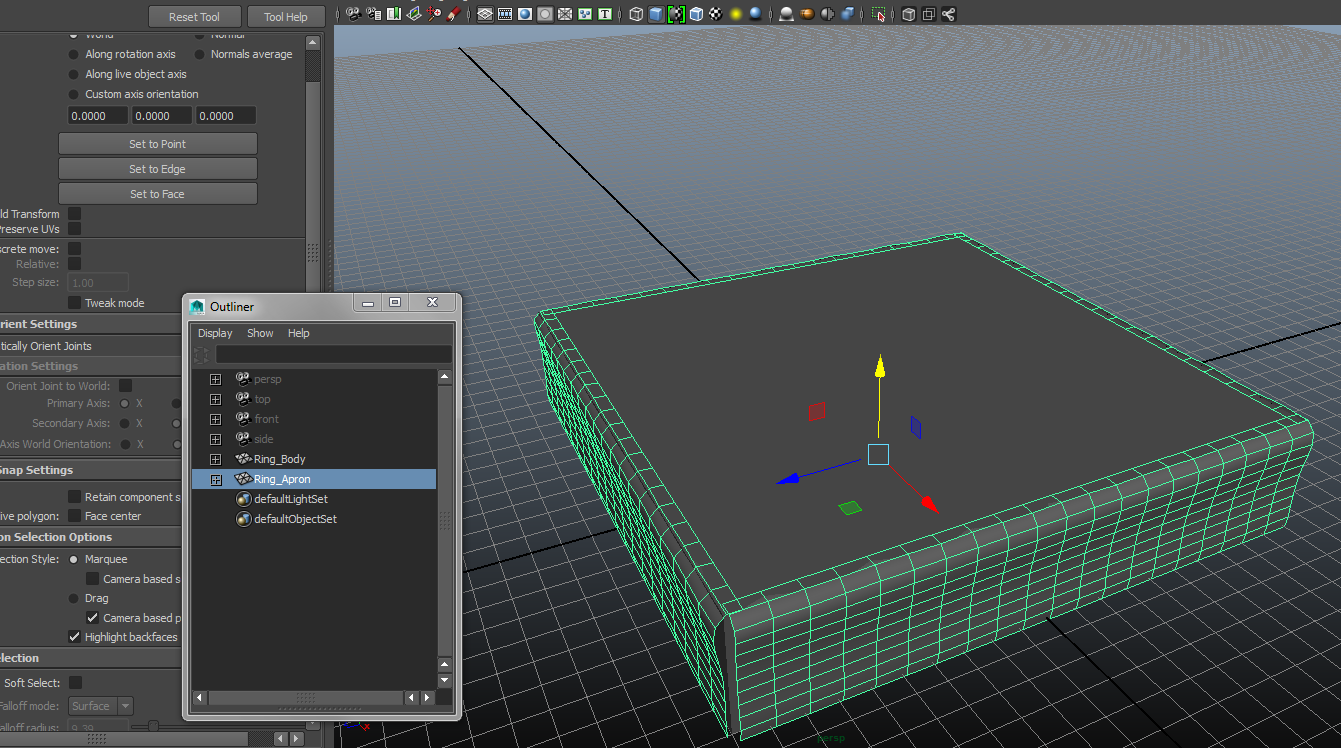
Working forward, I began creating a higher quality version of the ring. The anatomy of a Wrestling Ring is supported wood for the central area which is elevated. The apron is attached to the outside of the supports and covers the bare frame of the ring (and hides the tables, ladders, chairs, kendo sticks[?!] and other weapons wrestlers may use) To create the apron, I applied a cloth modifier to a plane and attached the top line of verts to the cube (ring floor). Simulating the cloth to drop then deleting the history of the plane froze the apron in it's current state. I duplicated this for all four sides.
I was sure to keep items organised in the Outliner. This is to make navigating objects easier.


The ring posts I made using cylinders and rounded off the tops, then attached the turnbuckles to the posts. The turnbuckles were spheres which I altered using soft selection and smoothing (3 on keyboard) - This doesn't alter the poly history, so undoing won't remove this. 1 on the keyboard will, however. Just a note.
I released screenshots on Facebook periodically, as I have a number of 3D modellers and animators (2D and CG). Martin Bell the guy behind Yes, Commissioner, http://www.yescommissioner.com/
Martin has given me a lot of great feedback in the past with regards to both modelling and animation and praise for a clean Outliner is always helpful.


Adding the ropes and stairs, again, keeping the Outliner tightly disciplined.

Again, Martin was giving me more feedback. The stairs needed a little tweaking. I was already considering redoing them, as they weren't looking quite right.
I began bordering the area with guard rails before I had noticed the issue with the stairs...

So it was a simple matter to fix up the set of stairs. 

The apron issue is mainly caused by the default lighting. The actual curve isn't too bad.

A test for UV texturing the Apron. Also visible is the ramp and entrance stage. These are added purely for aesthetic.

More texturing is required and the majority of modelling is complete, just a few more additions and the modelling is done.

Some reference shots that were used specifically for these models. (For other Reference, see Mood Boards in previous post)

The Entrance Stage from NXT, WWE's developmental show.


Barriers surrounding the area. These have more interest than the WWE RAW/Smackdown barriers, which are essentially foam padded blocks.

Monday 9 February 2015

Production Project Week1

Week 1-
I have a few pieces for this project - Free Use models, but they need to be altered slightly. Their textures aren't quite right for my purpose.
I have my idea, though! So that's something!
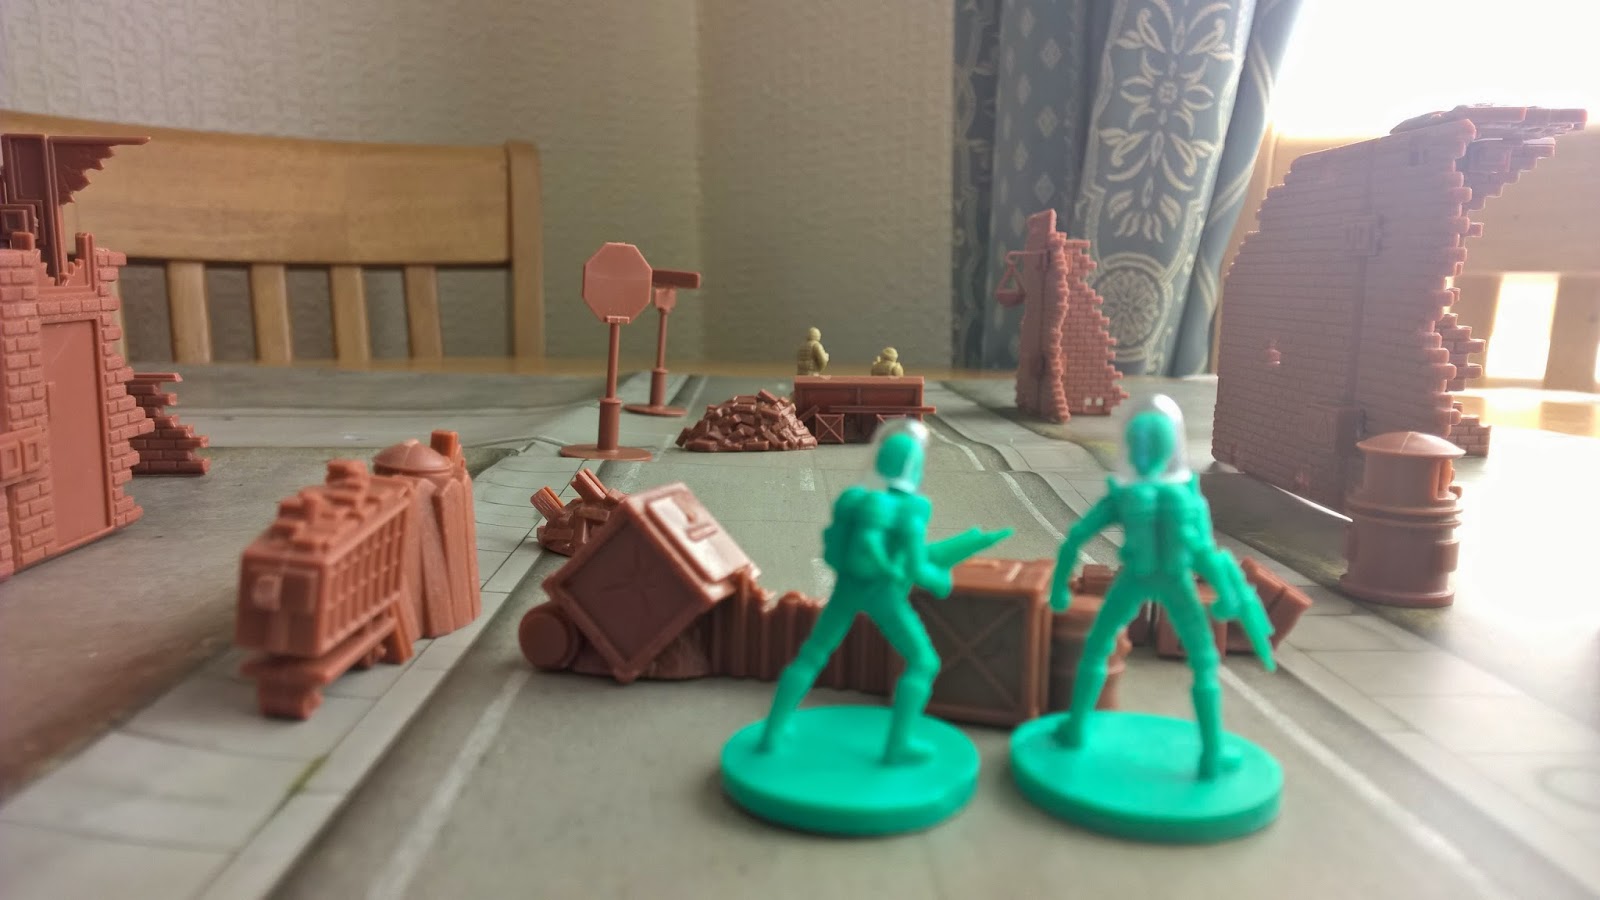
So my idea is a pair of soldiers making a plan to attack a pair of aliens who are firing down at them.
Inspired by the game Xcom, especially the Pitch Cinematic https://www.youtube.com/watch?v=h1QnIfsSKYA - animated by Justin Thomas and Kevin Bradley.


Using pieces from the Mantic Games miniatures game, Mars Attacks, I set up some initial Staging shots. Camera angles that I would keep in mind for the final animation. Keep in mind, cameras in Maya are able to get a lot closer to the ground than a mobile phone can when shooting 28mm models.


Even some videos testing some alternate angles.


Advanced Animation and VFX WEEK 1

Week 1:
The project brief has been given to us and I began generating ideas. I initially thought of pyro simulations but settled on animation. I wanted to animate interaction between two characters, as although animating a single character can be challenging, interaction has it's own difficulties which, as an animator, is a challenge which must be conquered. As a fan of wrestling, I decided to have my characters fighting. During the University's Future Fest, I attended a workshop and lecture by Chris Lackey who tasked us to create a layout for a comic page. I had set a sequence based on a Seth Rollins and Rob Van Dam fight.


Using this initial sequence, I expanded it out to create a 38 second sequence. Taking inspiration from the Seth/RVD fight and incorporating a CM Punk/John Cena fight (For the GTS)


Models I plan to use are both created by Ugur Ulvi Yetiskin. The Heel Character will be portrayed by a model called "Ultimate Beefy": http://www.creativecrash.com/maya/downloads/character-rigs/c/ultimate-beefy


The Face character will be a model called "Ultimate Bony":  http://www.creativecrash.com/maya/downloads/character-rigs/c/ultimate-bony

I chose these models for their stark contrast to each other. The muscular character playing the Heel as larger characters are often made Heels in WWE (Big Show, Triple H, Kane, Bray Wyatt) and the thin character as a Face (CM Punk, Kofi Kingston, Dean Ambrose)
The lack of face on the characters would allow me to focus more on the body language of the characters, which is a key part of character animation, allowing appeal. 

MOOD BOARDS

Faces in Wrestling

Heels in Wrestling

The Ring.


Animation will be done in Maya. I have been spending a lot of time using Maya since Summer, preferring to use this more than 3Ds Max. 
Maya's use in Industry ranges from it's use in films such as The Matrix, Avatar, Rango and Frozen, to television series' such as The Walking Dead, Futurama and South Park.

Cameras within Maya. I would use a 50mm camera due to it being a "normal" setting. By "Normal" or "Standard" I mean that the image rendered will match the human eye. 
Lighting set ups. I will be using real world WWE lighting set ups as a basis for the setting in the piece.
Real world example

A 3D rendering of the lighting set up and Titantron

In my scene, the spotlights facing the crowd will not be necessary. These are primarily used for the themes of the wrestlers.

3D Animation Pipeline. http://youtu.be/sgvfMfsBmRk

REFERENCE FOOTAGE/INSPIRATIONS.
The animation I plan on doing isn't exactly something you can comfortably do in the living room. The moves shown are performed by highly trained individuals. Even simple moves require a lot of training. The two moves shown in this piece have the ability to go very wrong if you are not properly trained, both for the move and physical fitness.

Seth Rollins - Curb Stomp

CM Punk - GTS

Zombie Cagefighter - Rubber Onion Animation, Stephen Brooks
A 2D animation updated to be on 1s and in some sections, 2s. Excellent staging and a great example of character interaction.

Suplex Wrestling Fatality - Pavel Barnev
More character interaction. Excellent secondary motion.

Power Rangers Origins *LEAKED TRAILER* (Low Quality)
https://www.youtube.com/watch?v=5ZStdULolg0
The character animation in this video is just awesome. It's all in the super hero poses.


Block In - Preliminary
A preliminary section of blocked in animation. This footage is very early and will very likely be reworked before the final piece.
Blocking in animation is used for timing purposes. Creating Blocked in animation in Maya is done in the Trax editor. Using this editor can be found in this tutorial: https://www.youtube.com/watch?v=avhszxFS2Mw

WEEK ONE GANNT CHART:
Each week, I will show an updated Gannt Chart